My Personalized Notebook

|
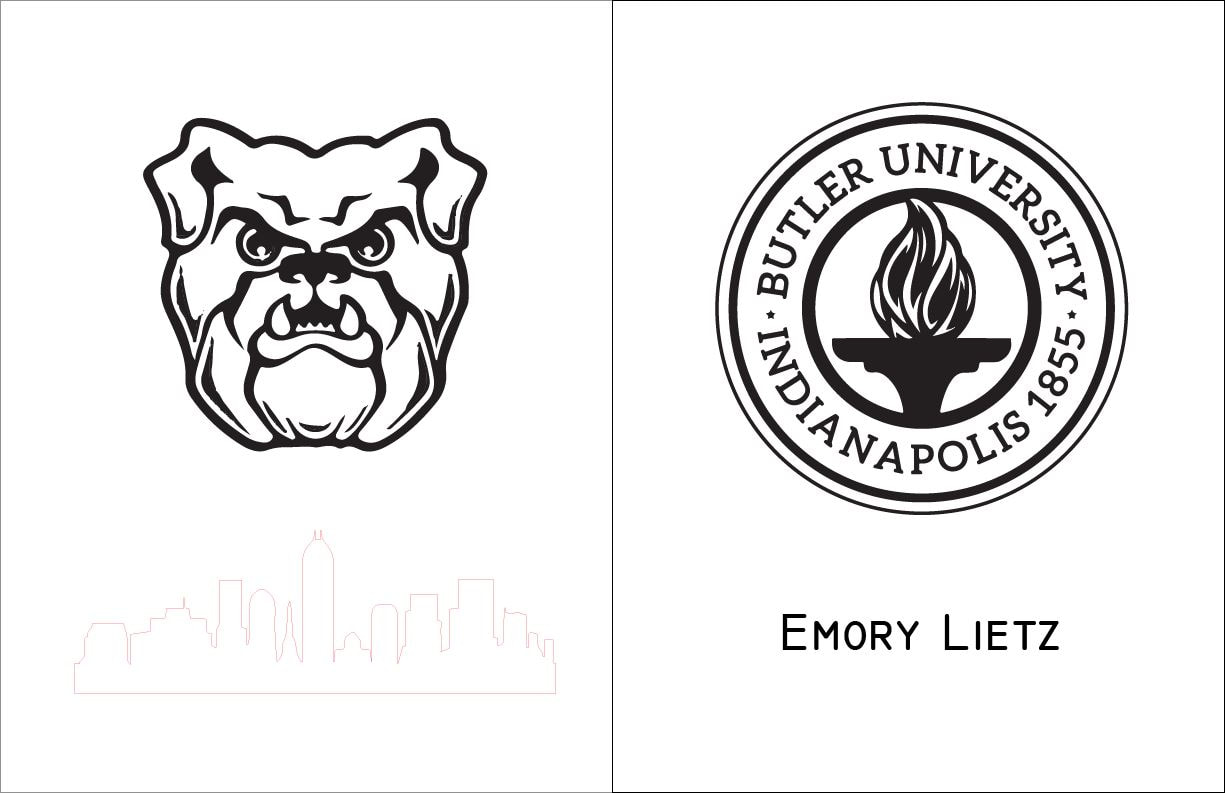
Here's my illustrator file for my notebook. I inserted the bulldog, crest, and skyline from Google. I image traced the bulldog and crest with the mode "3 color", and I ignored white for both. Then once I expanded it, I resized them and centered them.
The skyline was already a silhouette, so I traced it with the mode "Black and white logo". I selected no fill and changed the outline to .0001 red. I centered this on the page too and then headed down to the laser. Finally, I made a 4.25 x 5.5 inch box the size of each artboard and changed the line to Red .0001 width. This is important because I needed the laser to actually cut my front and back cover. If I didn't have this box, the design would be "stuck" in the mat board. |
|
|
|
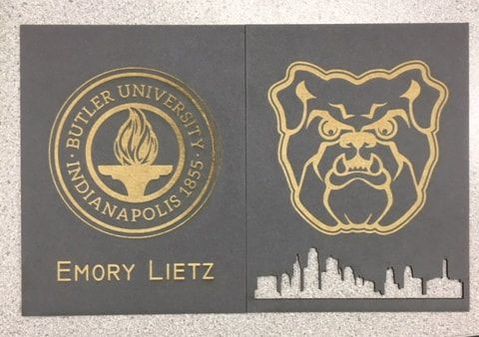
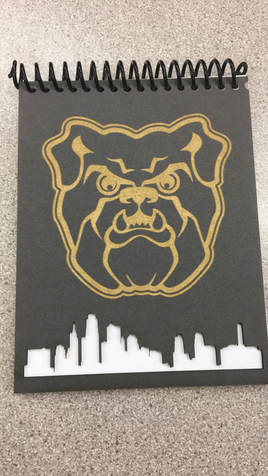
Above you can see my final product!! I cut 5 sheets of paper in half and then half again to to make the pages. I took the front cover and hole punched it using the notebook binder. Then, I punched the back and I made sure that the design was face-down so that the perforation lined up. I punched the the paper, and then lined up all the holes for assembly.
Next, I grabbed a plastic spiral binding from the box by the hole puncher. I threaded it through the holes and used wire cutters to snip it to the appropriate length. When it was cut, I used needle-nose pliers to bend the ends in towards themselves so that it couldn't come unwound.
Next, I grabbed a plastic spiral binding from the box by the hole puncher. I threaded it through the holes and used wire cutters to snip it to the appropriate length. When it was cut, I used needle-nose pliers to bend the ends in towards themselves so that it couldn't come unwound.
|
I promise we're productive in class. Here's the picture before I started engraving my mat board.
|
Image sources:
https://en.wikipedia.org/wiki/Butler_University
https://www.prepsportswear.com/college/us/indiana/butler-university-bulldogs-indianapolis?schoolid=2469328
http://www.vinylsilhouettes.com/indianapolis-indiana-skyline-decal
https://en.wikipedia.org/wiki/Butler_University
https://www.prepsportswear.com/college/us/indiana/butler-university-bulldogs-indianapolis?schoolid=2469328
http://www.vinylsilhouettes.com/indianapolis-indiana-skyline-decal
My Customized Water Bottle
|
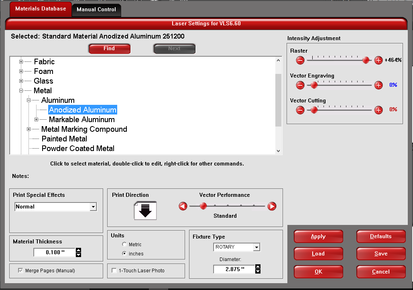
In the setup screen, it's important to select anodized aluminum so that the laser knows to just take the coating off of the bottle. Then, under fixture type, select "rotary". I used the dial caliper to measure the bottle's diameter, and entered the appropriate value.
|
|
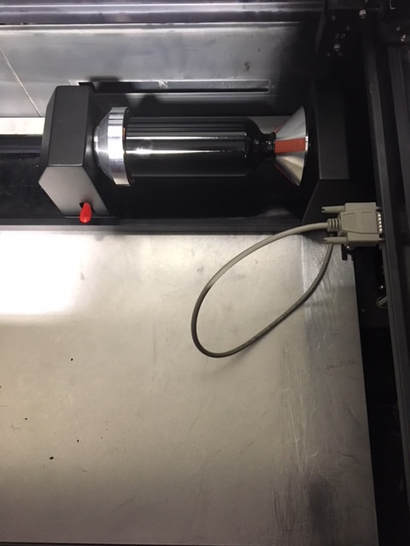
With the laser turned off, I set up the rotary jig. First, I opened the laser bed and removed the tray. Then, I positioned the jig in the back right hand corner of the bed and secured it by putting it over the two bolts. Then, I plugged the cord into the side of the laser. Finally, I inserted my water bottle into the jig and made sure that it was tight by using the red lever.
It's very important to close the front of the laser bed so that it will actually engrave, I forgot to do that the first time I hit play. |
|
|
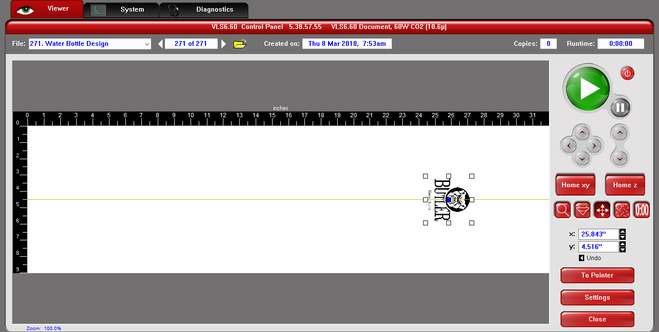
I first used the second tool in the toolbar to position the laser in the middle of my bottle. Once it was centered, I used the cross hair tool to select the center of my image.
After I checked to make sure that the top of my image and bottom of my image would still be engraved onto the bottle, I closed the lid, turned on the fan, and pressed play. |

|
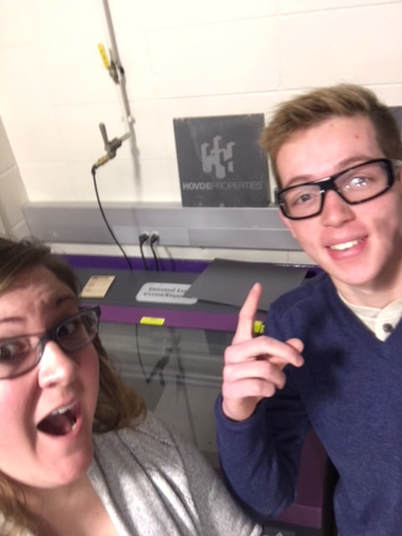
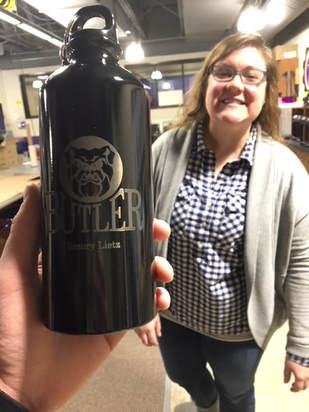
Left: Here's a picture of my water bottle being engraved. It took about 10 minutes for the design to complete.
Right: Here's the final product!! Obviously Mrs. Proctor is happy with it, and I am too! |
|
Image source:
https://www.theindychannel.com/news/local-news/butler-bowl-to-be-renamed-after-9-million-donation
https://www.theindychannel.com/news/local-news/butler-bowl-to-be-renamed-after-9-million-donation
3D Laser Print?!
|
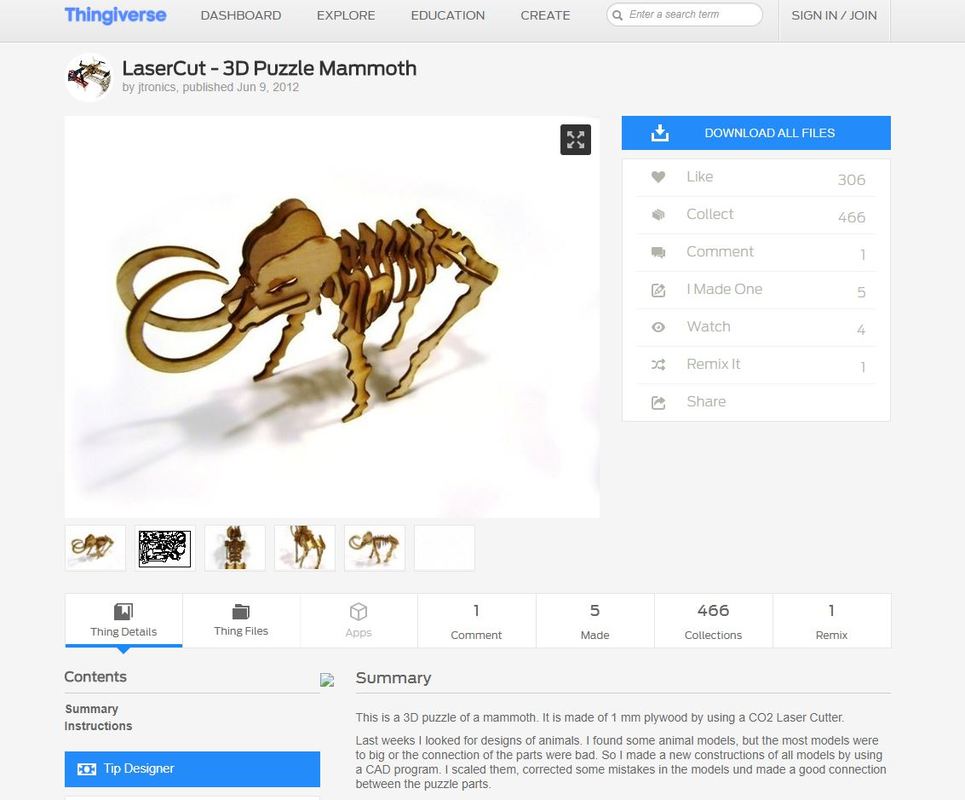
Here's the thingiverse design I hoped to create by cutting out pieces on the laser. Thanks to user "jtronics" for allowing the community to download the files necessary.
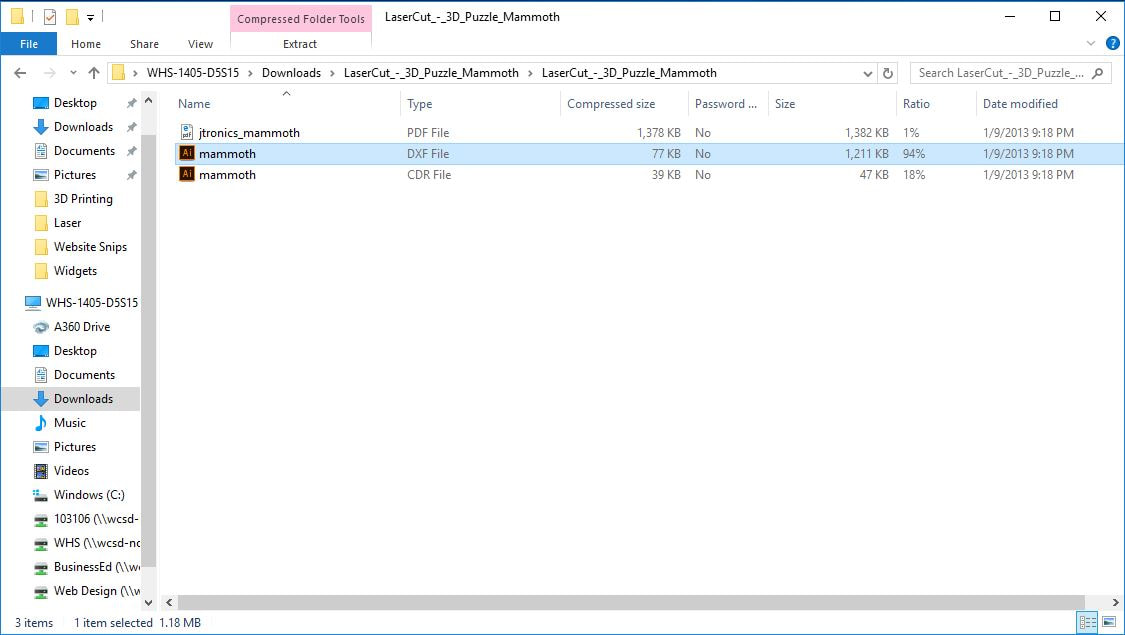
I "Downloaded All Files" and opened the new downloaded folder. Source: https://www.thingiverse.com/thing:24616 |
|
Next, I opened the first Illustrator file titled mammoth. I kept the original dimensions when prompted.
|
|

|
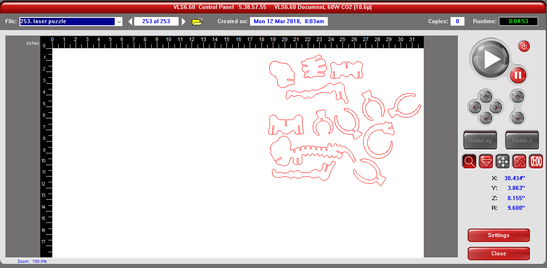
Here's my artboard in Illustrator. It's hard to see, but I changed all the lines to .0001 Red. I had to make sure that I spread the individual pieces out to avoid a fire (again). I learned that if the pieces are too close together when using cardboard (foamcore), then a fire will start.
I measured the thickness of my cardboard and recorded the measurement (.115 in). Then, I resized my pieces so that the "slit" width was roughly .11 in. Mrs. Proctor assured me that the 5 one-thousandths of an inch wouldn't have much of an impact on the construction, and she was right once again. |
|
Here's that fire I was talking about... Thanks, Mrs. Proctor for helping me put it out.
|

|
|
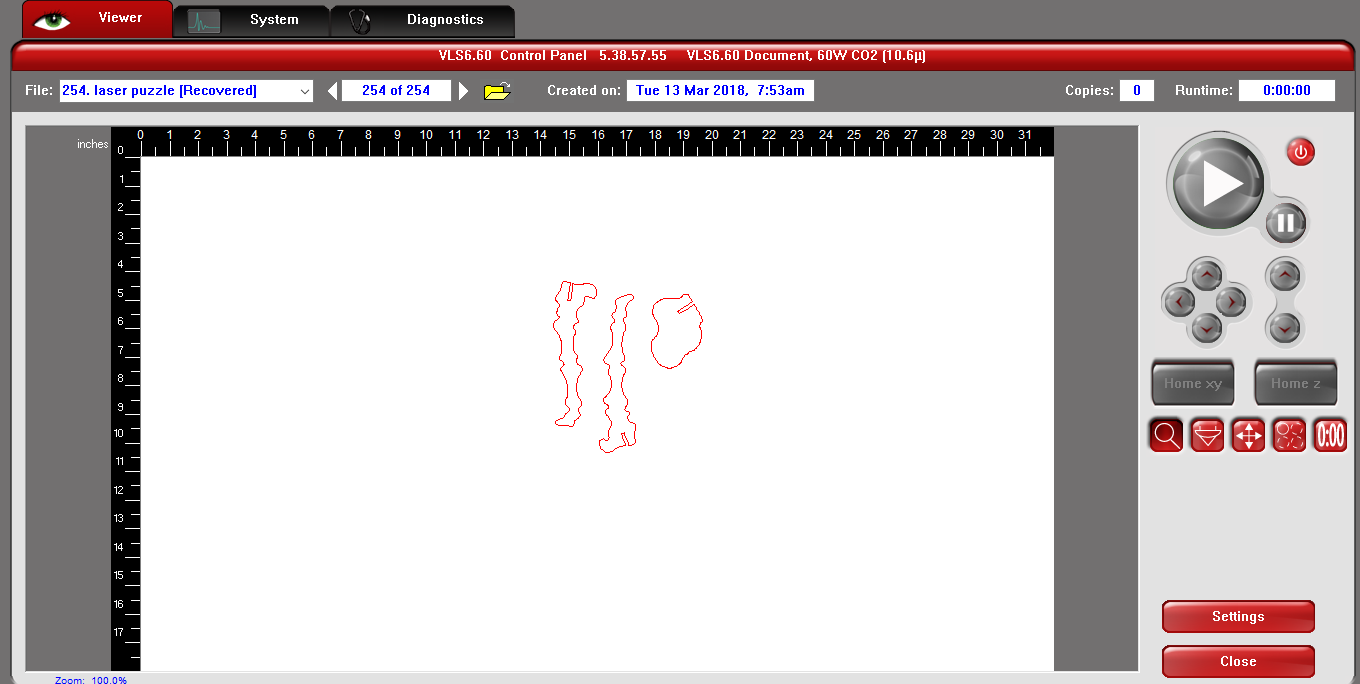
Here's the UCP once I printed the file. You might be able to tell that I'm missing a couple pieces, so I had to cut those out at a later date. These cut out with no fires, however!
|
|
Here are the pieces that I missed. They only started a small fire because Mr. Willauer forgot to reset some settings on the laser. After they got reset, the laser bed rose up, and they cut out no problem.
|
|
|
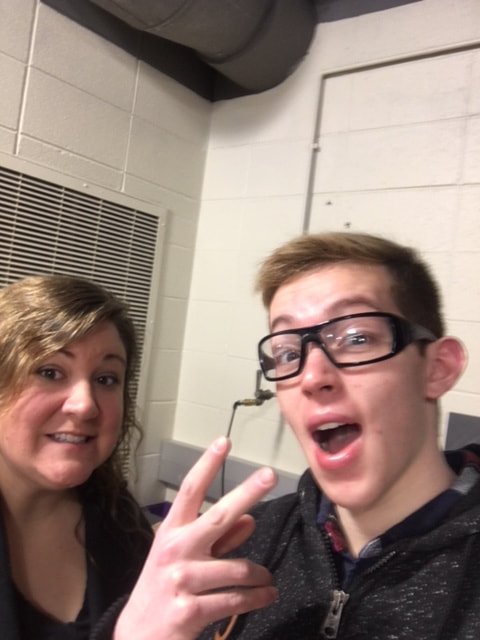
Someone order a picture of me working on a machine?
|
|
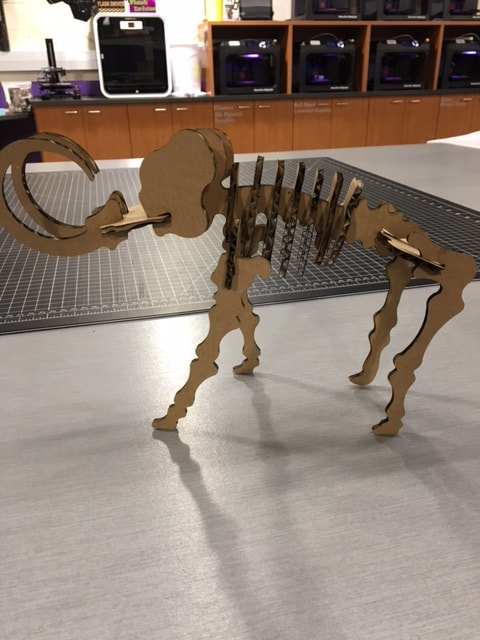
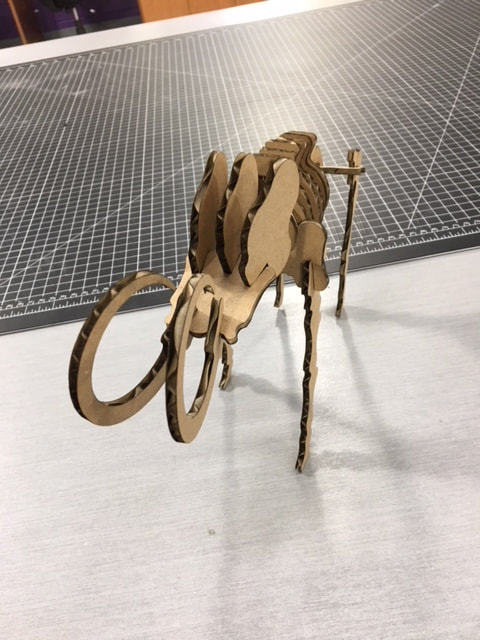
This project might've been a fire hazard and a lot of outside work, but I'm very happy with how it turned out! The pieces don't fit exactly together, but they can be "smooshed" to fit.
Maybe if I have time I'll cut it out of a different, more sturdy material. |
|
Summary
The laser rotation is probably the fastest-paced rotation of all. I learned how to work efficiently and use class time effectively. I managed to design and make my entire notebook in the first class. However, even if you work efficiently all class, you might need to work outside of class to get everything done on time. I ended up coming in twice in the morning to finish my mammoth, and I started two fires in the process.
Speaking of fires, I learned a lot about the laser. First, I learned that when using cardboard, you should select "Foamcore" as the material in the UCP. Secondly, if your pieces are too close together, then you might start a fire. All in all, I thought it was very cool to create a 3D object from relatively flat pieces.
I learned how to use and set up a rotary jig in the laser. It's important to secure the jig to the bolts in the back right corner of the laser bed and to plug it into the laser. Once it's secured, you can adjust it by using the red lever on the side. When using the jig it's very important that the "fixture type" is set to rotary in the UCP.
I struggled a bit in this rotation, from setting fires to losing a flashdrive and having to remake my files, but I had a lot of fun making three unique projects.
