Constraints:
|
|
A CHEESE GRATER MADE OF CANS?
just kidding, that idea got rejected
A (equally cool) chess board?
might as well
|
|
Inventor and 3D Printing
|
|
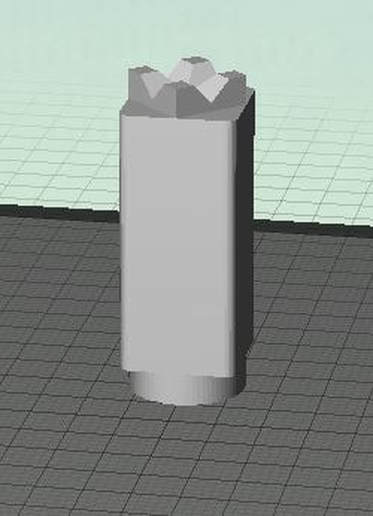
In inventor, we 3D modeled all of our chess pieces so that they could be 3D printed. I made the Pawn, King, Queen, and Bishop, and Evan made the Rook and Knight.
On the bottom of each piece, we added a circle with a 1 inch diameter and extruded it .28 inches (as per our research of the depth of a bottle cap) so that it could fit inside of the bottle cap. |
|
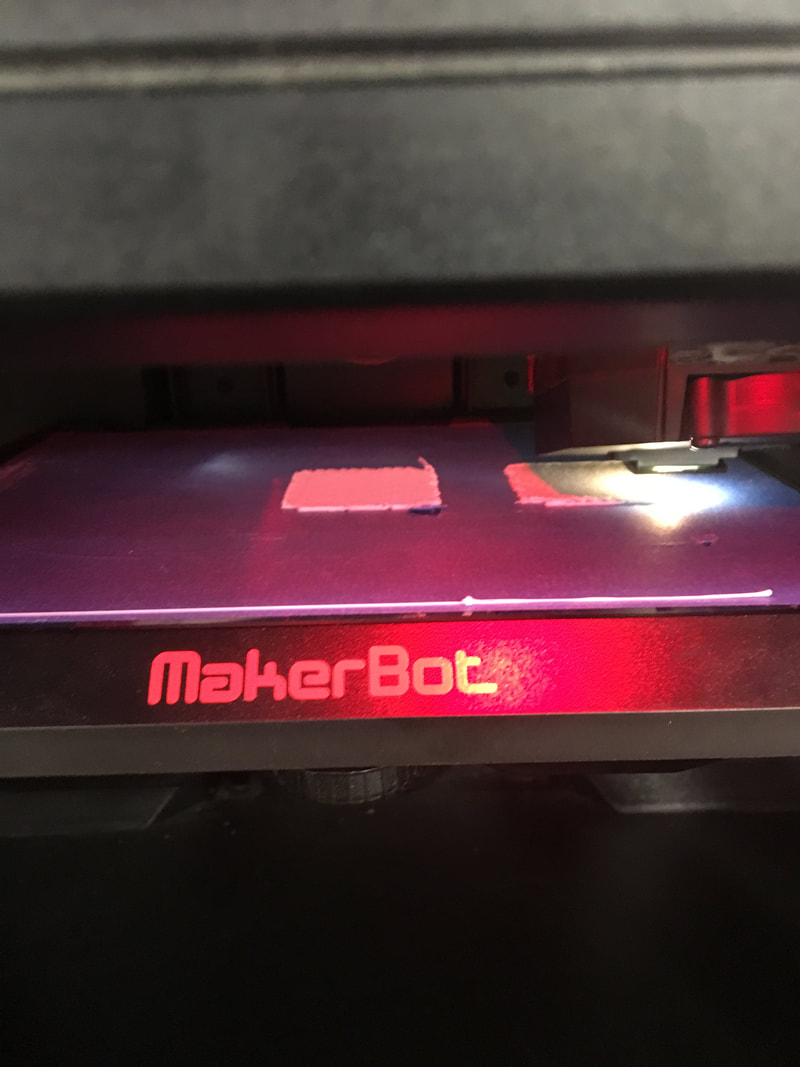
First, Evan and I 3D printed one piece as a "test run" to see if the pieces would need supports or not. I printed a king without supports, and it turned out just fine. Here's the picture of my MakerBot setup for our test run.
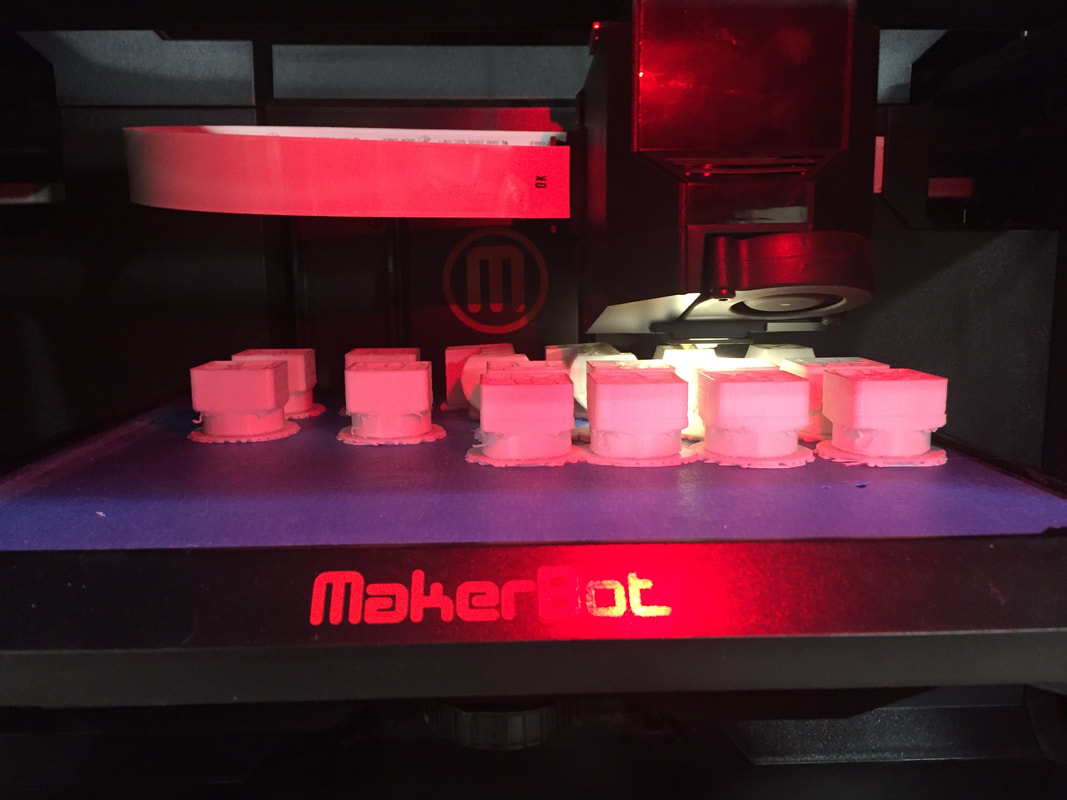
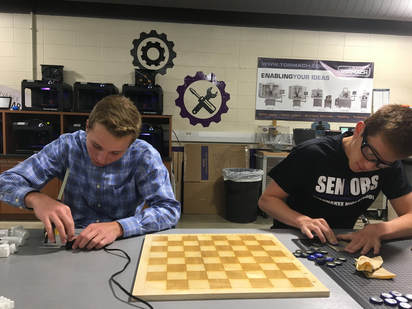
After this, we 3D printed the rest of our pieces in one go. Evan loaded white filament into one printer and I loaded black into the other. We added 8 pawns, 2 rooks, 2 bishops, 2 knights, a king, and a queen to each MakerBot setup, and we waited 14 hours for the print to complete. |
|
|
Left: Here are the first two rafts of our white 3D print. Eventually, all 16 pieces will be printed out on this printer.
Right: At this point, the pieces are about 40% done printing. They look very good! |
|
|
A little blurry, but Proctor and I always have a good time in class.
|

|
Illustrator and the Laser
|
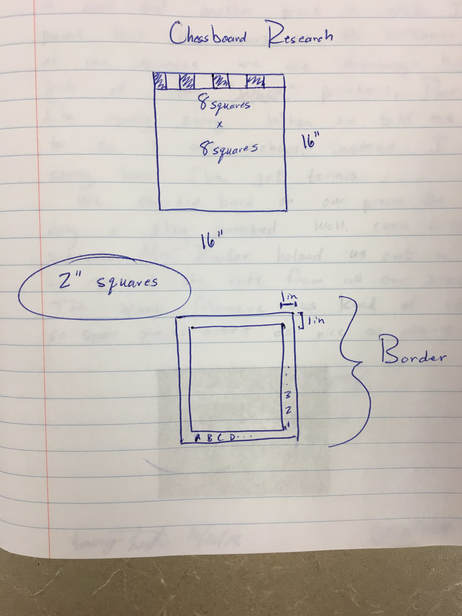
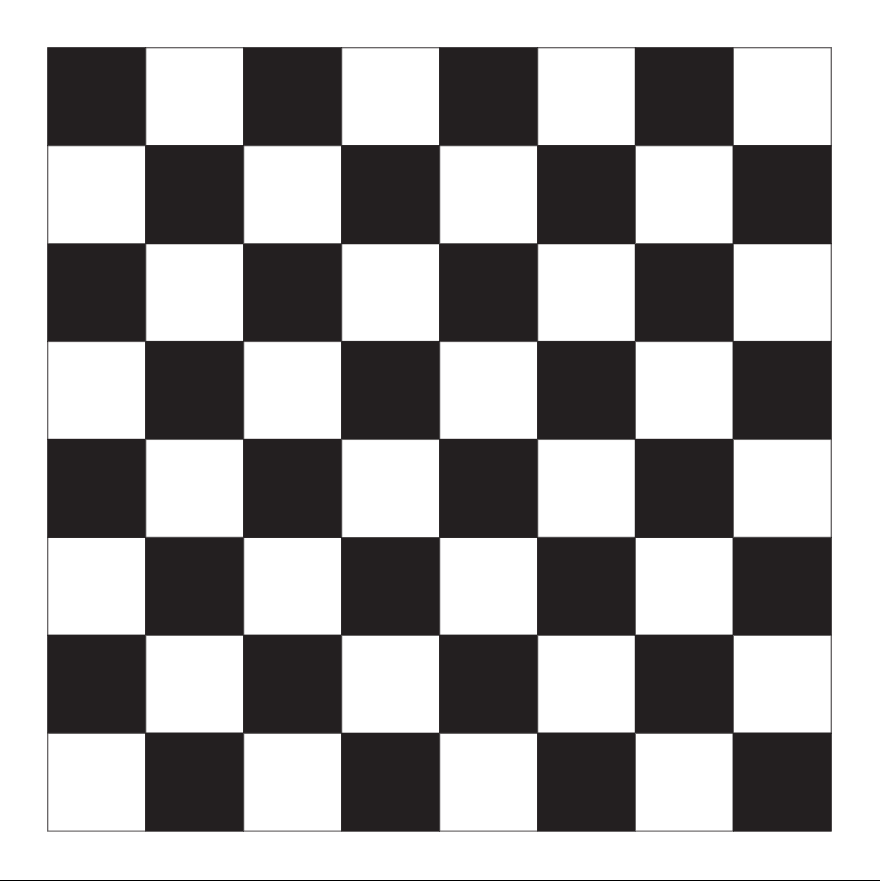
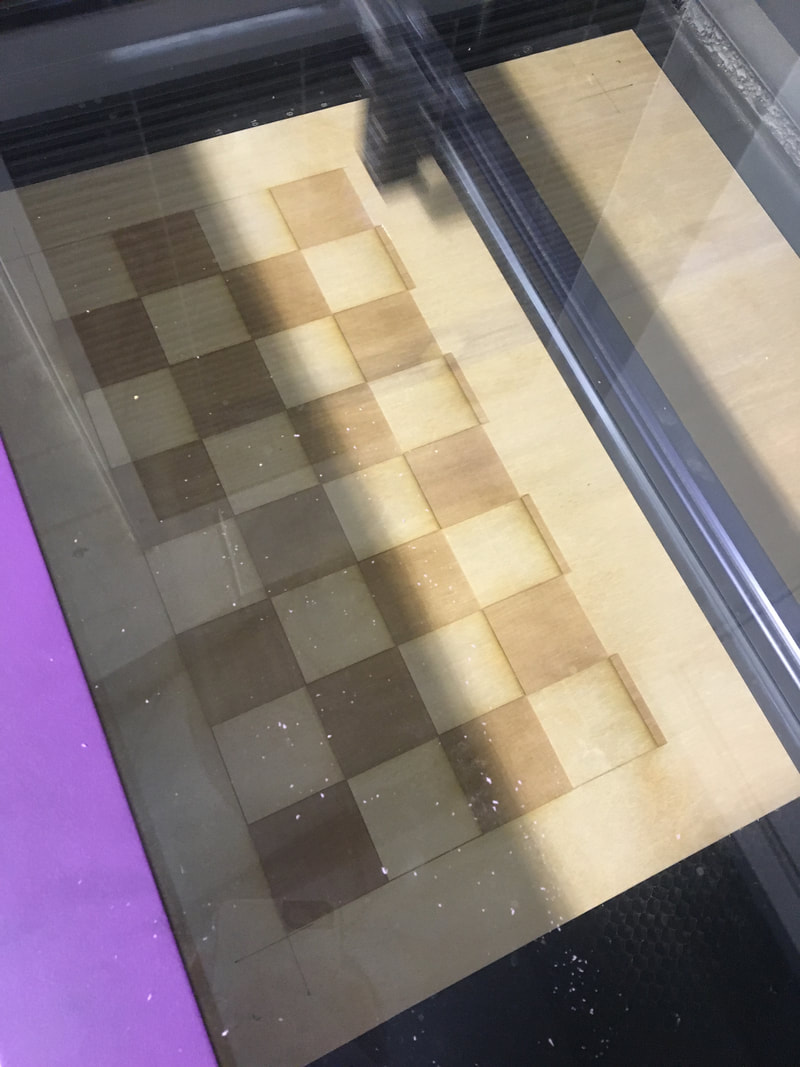
In Illustrator, I designed the checkerboard pattern to be engraved into our wood. I made a 2" x 2" white square, and I copied and pasted it multiple times until I had a column.
Then, I selected all the squares in the column and translated them to the right. Now I had a grid of white squares. Using the CTRL key, I selected every other square, and I changed the fill to black. Thus, the design was made and ready to go to the laser. |
|
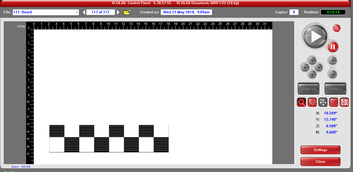
In the UCP, I selected hard wood as my material and the thickness was half of an inch.
Now I had to sit next to the laser and watch it engrave to make sure no fires started (see laser rotation). The laser ended up taking about 85 minutes to engrave, which kept me in the Innovation Center well past the bell. In fact, I stayed through the entire contact time to watch it engrave, but at least I got good review in for my Spanish quiz second hour! |
|
|
BONUS MACHINE: Table Saw
|
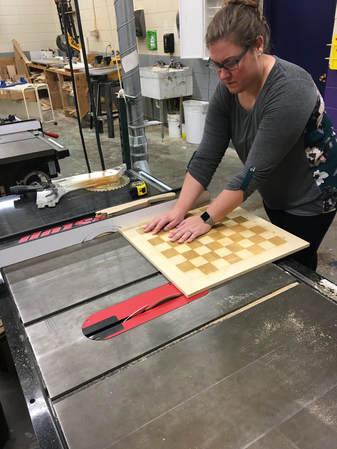
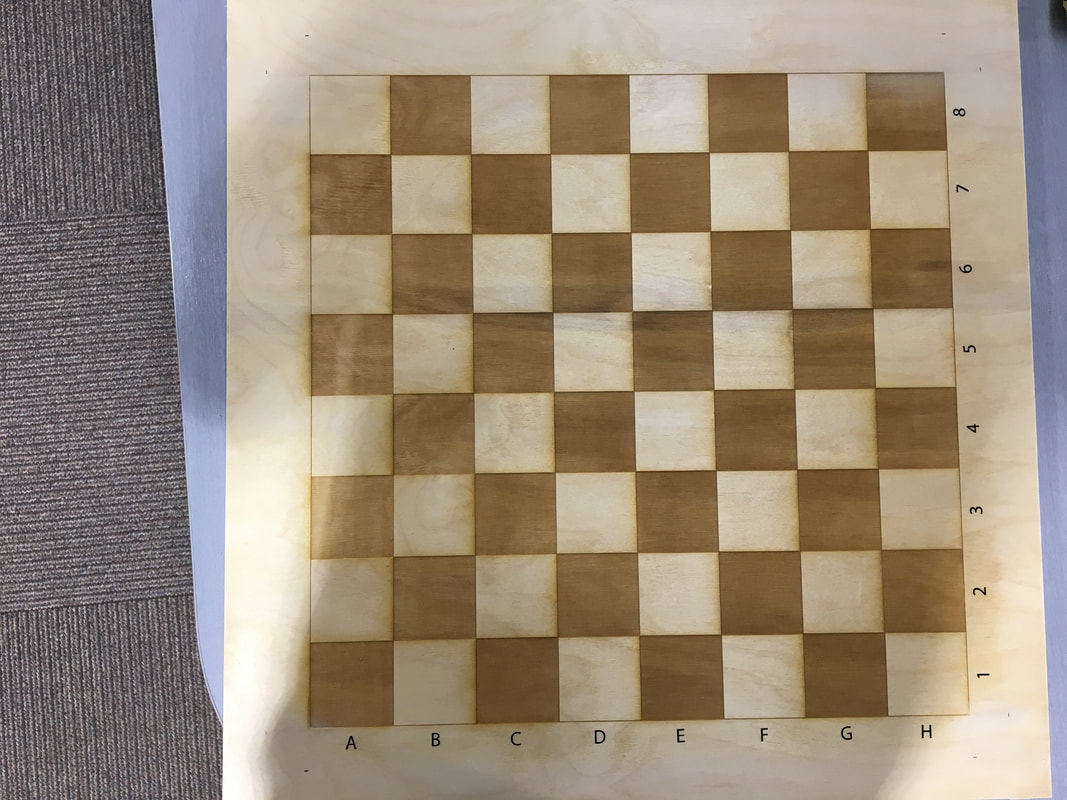
After the board was engraved, Evan and I realized that it wasn't exactly square or centered on the board. So we made a one inch boarder from the edge of all the engraved squares, and Mrs. Proctor came to the woods shop with me to help me get the grid centered and squared.
Even though I used the table saw in Intro to Industrial Technology. that class was freshman year, so I asked for help. |
Vinyl Cutter and Coordinates

|
In Illustrator, I made two very simple text boxes containing upper case letters A-H and numbers 1-8 to be put directly on the chess board. I loaded up the file into Cutting Master and Evan loaded the black, glossy vinyl.
After letting the machine scan the sheet, we oriented our letters and numbers such that they used the least amount of vinyl. We sent it and it took maybe 10 seconds to cut out. |

|
|
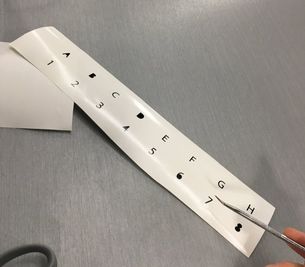
Here you can see me weeding out the black from our cut with my dental tool!
Mr. Willauer suggested that we don't use transfer tape because the letters are so small and the wood is porous, so instead, Evan and I took them one by one and smooshed them down onto our board with our fingers. To make sure they were straight, Evan and I marked the middle of each square in the grid, and we laid down a piece of masking tape to line up the bottom of each letter/number with. |
|
Finishing Touches
|
|
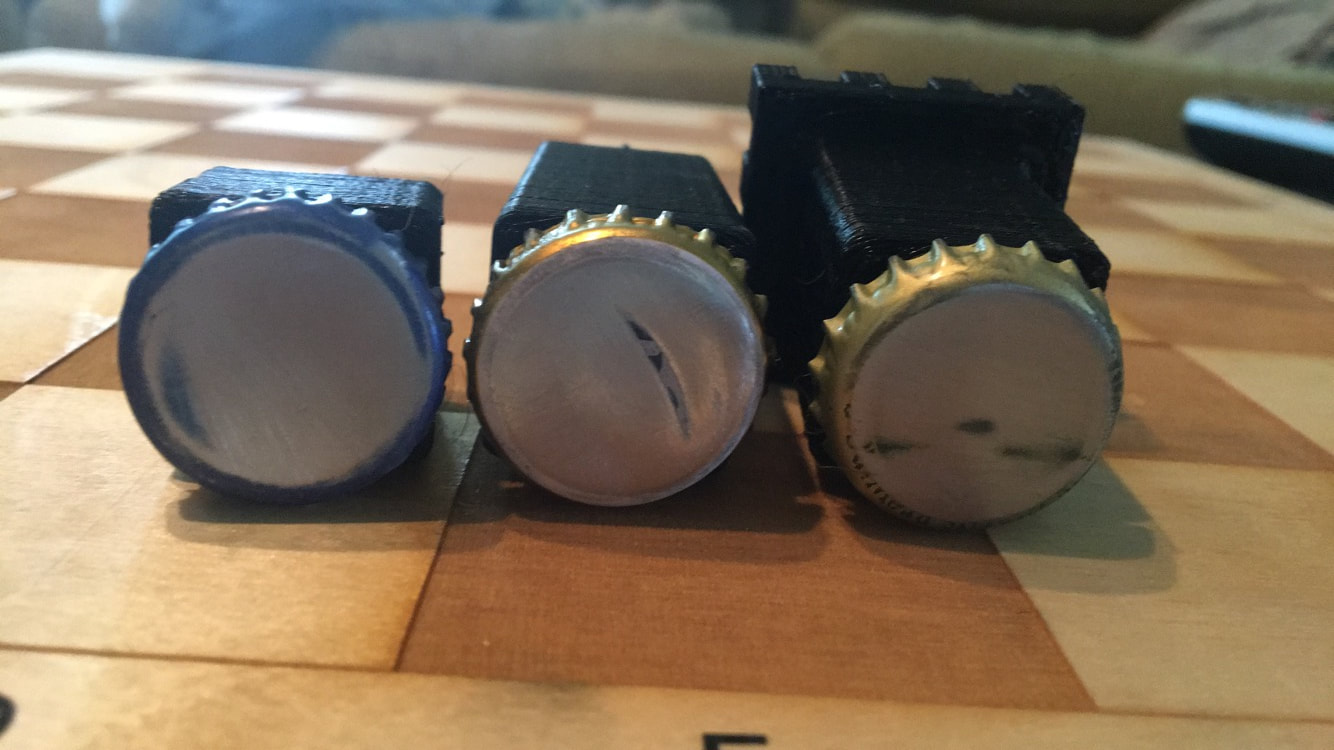
Finally, Evan and I glued out bottle caps to the bottom of our pieces. I sanded the logos off with 220 grit sandpaper, and Evan worked the hot glue gun to attach the parts. We ended up using blue Bud Light caps for the pawns (because we had the most), golden Miller Lite caps for the kings and queens, and bronze New Glarus caps for the rest of the back row pieces.
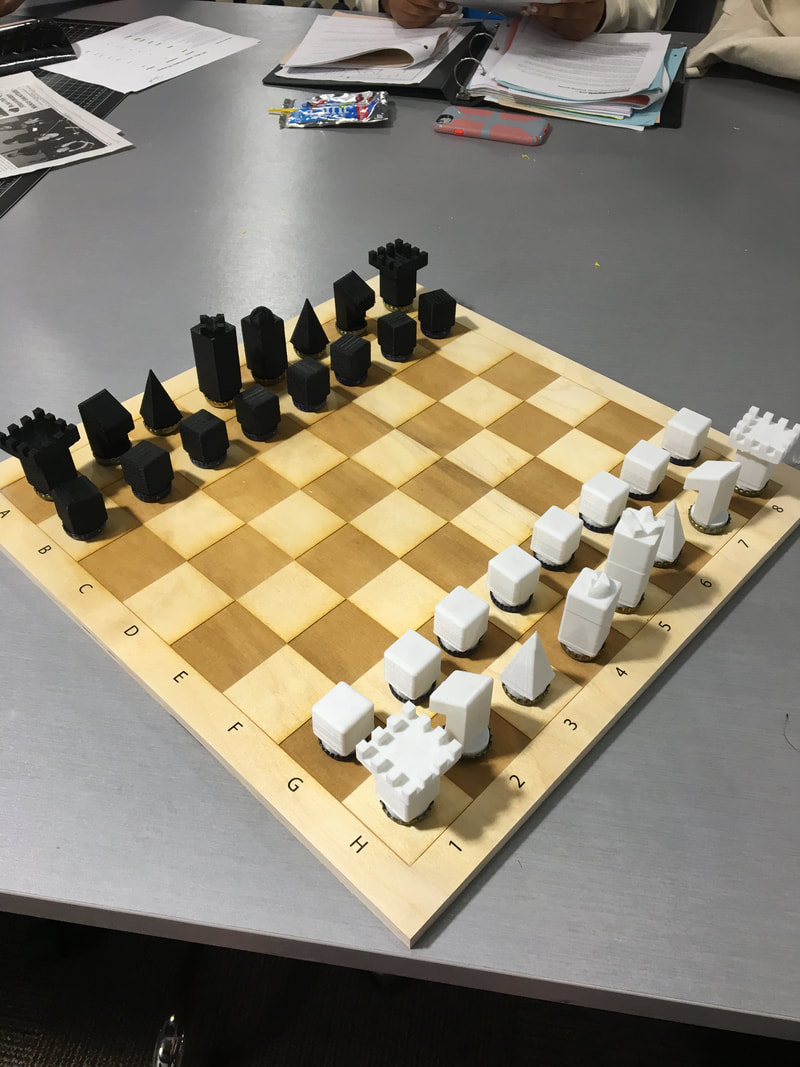
|
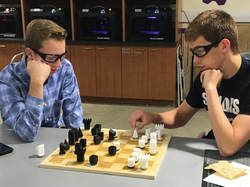
I think Evan was winning this game...
|
Summary
This is likely one of the largest scale, most involved, and coolest projects I've ever made in school. This truly is a final project that tested all of my knowledge of different programs and machines. In this project, I used: Inventor, Illustrator, MakerBot, CuttingMaster, The Laser, The 3D Printer, The Vinyl Cutter, and the Table Saw.
Evan and I ran into many obstacles during our work time, one being our very first idea. Evan and I first wanted to do a cheese grater made of can tops, but the instructors found a couple flaws in our process of building it. Instead, we learned to move forward with a new idea, and we problem solved from there. I'm very happy with how this project turned out, and the board itself looks amazing. Evan and I successfully recycled 32 bottle caps in this project, so I'd say it was a success in reducing the number of these tops that end up in landfills. Therefore, Evan and I learned how to make a creative project that has a positive impact on the world.
Evan and I ran into many obstacles during our work time, one being our very first idea. Evan and I first wanted to do a cheese grater made of can tops, but the instructors found a couple flaws in our process of building it. Instead, we learned to move forward with a new idea, and we problem solved from there. I'm very happy with how this project turned out, and the board itself looks amazing. Evan and I successfully recycled 32 bottle caps in this project, so I'd say it was a success in reducing the number of these tops that end up in landfills. Therefore, Evan and I learned how to make a creative project that has a positive impact on the world.
